How To Easily Insert Google Adsense Code Into WordPress Blog
Hello Fellow Bloggers! This blogging world can be so confusing when your foreign to new categories. I recently applied for the Google Adsense and Media.net ads. My blog was accepted in about 3 days.
I was so excited. I thought, ‘hey, it should be as simple as adding my URL and the ads will display by themselves’. Keeping reading to find out:‘How To Insert Google Adsense Code Into WordPress Blog.’
My Mistake Using Adsense
This is only part true. Sooo I thought my ads were running on my account with no issues. Lonnng story short there were some additional steps that needed to be done. I had a hard time finding easy ways just to put these darn ads on my blog without all that coding stuff. So, after some researching, trial and errors, I have the key. Yayyy!!! Read on to find out how to add ad codes simply to your wordpress blog.
Adding Google Adsense code to your site is a way you monetize your site. In other words, it is a way to make money. When people come to your site you make money from the ads that they see or interact with. (See more about this here).
Related Post: How I grew my Pinterest Views from 21k to 74k in less than 2 months (Update: Now at 1 Million Monthly Viewers For Pinterest)
Step 1: Sign Up For Google Adsense
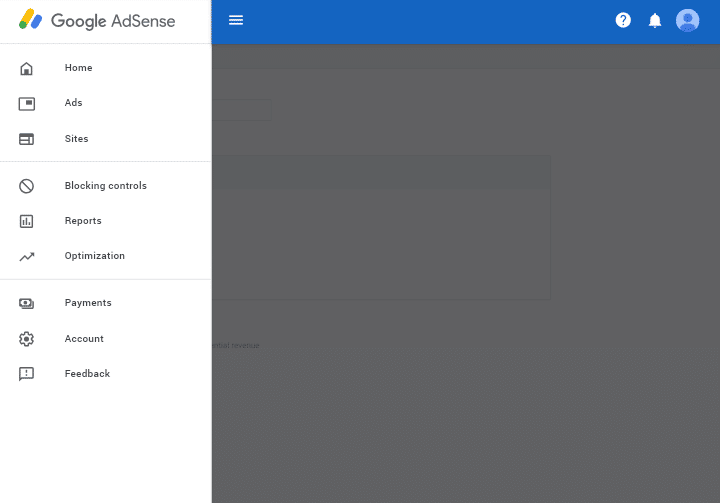
In the event, that you are approved for google adsense ads. You will find all of the information you need in the dashboard area.
- Click the icon with the three lines in the top left corner
- Click sign in
Here is how your dashboard will look once you are signed in. And after you click the three lines icon in the top left corner.
Tip: You will want to use a desktop, for a better expierence for this tutorial. Have two windows open. You should be logged into your wordpress.org dashboard and into your google adsense dashboard. This is because you will have to go back and forth.
2. Download A WP Plugin
- Go to your wordpress dashboard.
- Click on the icon that looks like a plug
- Click add new
- Go to the search icon and in that space type this plugin Insert HTML Snippet
- Click Install than click activate if it prompts you to. If not it has automatically been activated.
Related Post: How To Social Media Buttons Easily
3. Create A New Google Adsense Code
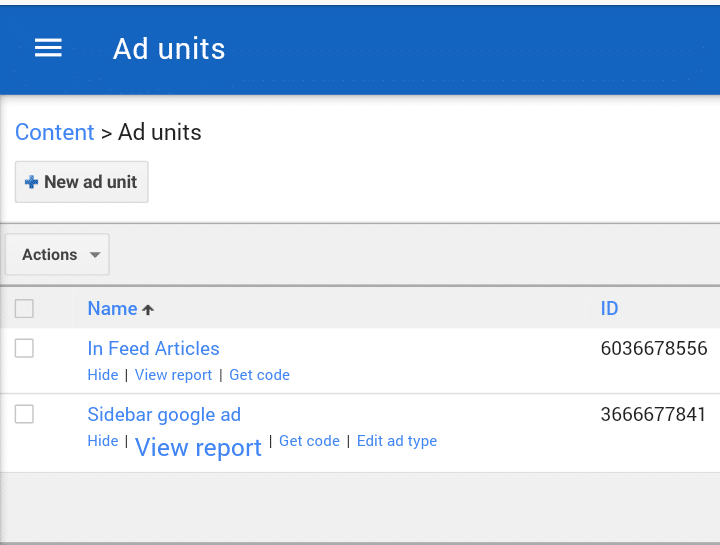
- Click on the window that has your Google Adsense page open.
- Click the icon on the top left corner that has the 3 lines
- From there click ad units
- Click new ad unit

- It will give you three options to choose from. In this tutorial I will choose the first one text and display ads.
4. Customize Your Selected Ad
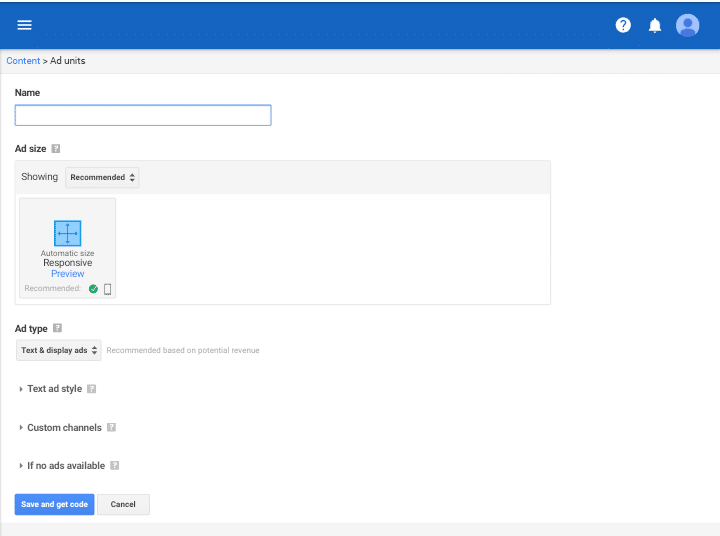
- Enter a name for the ad. I would choose something easy that will help you to remember what ad it is. For example, Sidebar ad. (This will not be visible to your visitors, only you)
- Keep the size at automatic and responsive. This means the ad will adjust for your reader, depending on the device they are using. It will not change your blog.
- Ad Type Dropdown should say text and display ads.
- Text Ad Style- Select one of the preset colors. But for branding customize the colors to match your blog. Just enter the number color into the boxes
- Channels- This is just an advanced setting, which is optional. We will disregard this for this tutorial.
5. Copy Google Adsense Code To Plugin
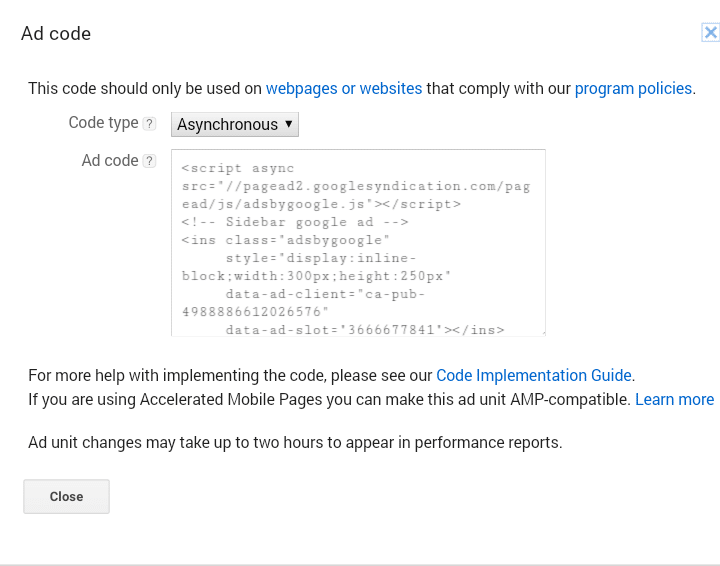
- Click save and get code (ugh, i hate coding too, but follow theses steps its simple)
- You will be given this long confusing code
- Select this all (right click)
- Copy your code
- Go to your wordpress dashboard
- Look for your Insert HTML Snippet icon (blue box that says HTML)
- Click HTML Snippets
- Click Ad New HTML Snippet
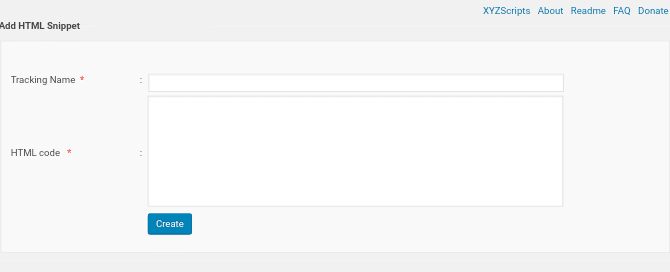
- Add a tracking name. You can use a name to help you remember the ad. I would use the ad name you used when creating your ad in the google adsense.
- Finally, paste and save your code.
6. ADD GOOGLE ADSENSE CODE TO YOUR WIDGET (LAST STEP)
Finally, you are at your last steps to being on your way to online success.
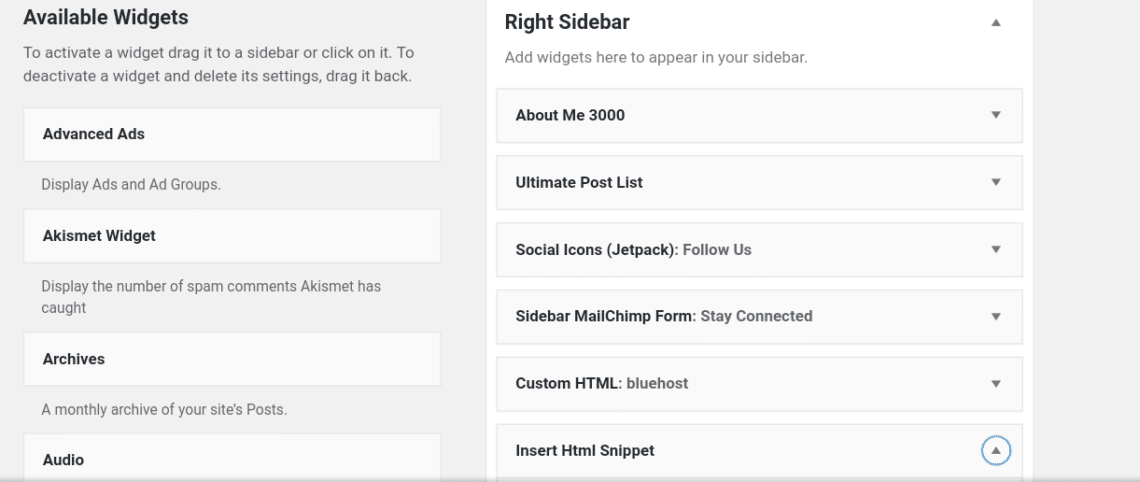
- Go to your wordpress dashboard
- Find your appearance icon(it looks like a paintbrush)
- In the given menu click widgets
- Go to your widgets and find the plugin
- INSERT HTML PLUGIN it will be under avaliable widgets
- Click on that dropdown menu on the plugin widget
- and click sidebar and save.Your screen should now look like this
Find your appearance icon(it looks like a paintbrush)In the given menu click widgets. Go to your widgets and find the plugin INSERT HTML PLUGIN it will be under avaliable widgetsClick on that dropdown menu on the plugin widget and click the sidebar and save. Your screen should now look like this
Congratulations! You have just added your first ad to your sidebar.
You can also place these Google Ads in your post, on select pages and more. I suggest using Insert Ad To Post plugin for this.
If you still need more help on placements of your ads I found this article helpful. Click here to view.
Quick Questions and Answers
Q:Can your add multiple ads to your blog? (media.net,adsense and more)
A: Yes, you can.
Q:Can I use auto ads and ad units?
A:Yes, ad units is manual ads that we place on our blog as we just did. Auto ads does it for you. I would add more for more revenue.
I didn’t plan on writing a post about this. But after seeing how complex it was. I said omg I have to write a post that breaks it all down step by step. How to simply add your ad code to your wp blog easily.And that answers all of the questions that I had along the way.
Did this work for you?
Before you go sign up to my free resource library to grab a checklist to help you make money from your blog.
What’s Next? Add Social Media Buttons To Your Blog Post Easily